There are many patterns online that can be used to make a scrollsaw, some even holiday-themed. These patterns can be used for making Santa mobiles, a basket, or even a nightlight! Get one now! Next, you can browse the many patterns available to help you find the right one! Scroll saws have many uses, making them fun and versatile.
Simple patterns with a scroll saw
A beginner scroll saw user should first learn how to create patterns. There are many different types of patterns that you can choose from. Some are adapted from papercraft or quilting. You can create patterns using high-contrast images to look hand-drawn. Learn how to use your scrollsaw by following these step-by–step tutorials. Many of these patterns can be found in woodworking magazines and publications.
Simple Pattern Projects with Scroll Saws is a great resource. It has 28 projects and detailed instructions on how to select the right wood. It even includes an area for you to create your own designs. You might be tempted not to use existing patterns, but there are many other ways you can get started with your scrollsaw. For example, you could make a wooden dog silhouette, a bird silhouette, or a heart out of wood.
A scroll saw is used to create a Santa Mobile
It is fun to create a Christmas tree-shaped Scroll Saw Mobile. You will need to first cut out two stars. Make sure to paint one red to match Santa Claus. Once you have cut these pieces, you can make Santa mobiles by making holes in one side and a point on the other. You can attach the mobile to the wire by coiling it.
Scroll saw patterns are also available for download. They range from simple two-piece designs, to more complex 3D patterns. You can find many scroll saw patterns online, some of which are printable. Next, select a pattern that interests you and start! There are many options. A scroll saw can be used to create a Santa mobile. This is a great way get ahead of the holiday season. It is possible to cut several pieces and stack them in order to sell them.
A scroll saw is used to make a basket

A scroll saw can be used to make a basket. You can create a beautiful basket with basic woodworking skills and some basic tools. This full-size scrollsaw pattern will show you how simple and quick it can be. What's the best part? It will take you no time to assemble your new creation.
This book covers all aspects of creating a functional, beautiful basket. To make the baskets, you'll need a scrollsaw. The book shows you how it is done. The book's four parts are the base, the rings, the handle and the handle. Each ring will require four 1/16" (2mm), bits, and a #3MGT blade.
With a scroll saw, create a nightlight
You can make a beautiful nightlight with a scroll saw if you are looking to increase your woodworking skills. There are many patterns that you can use to make a nightlight using a scroll saw. These projects are very easy to make and can be used to show off your sawing skills. Learn how to make a nightlight using a scroll saw.
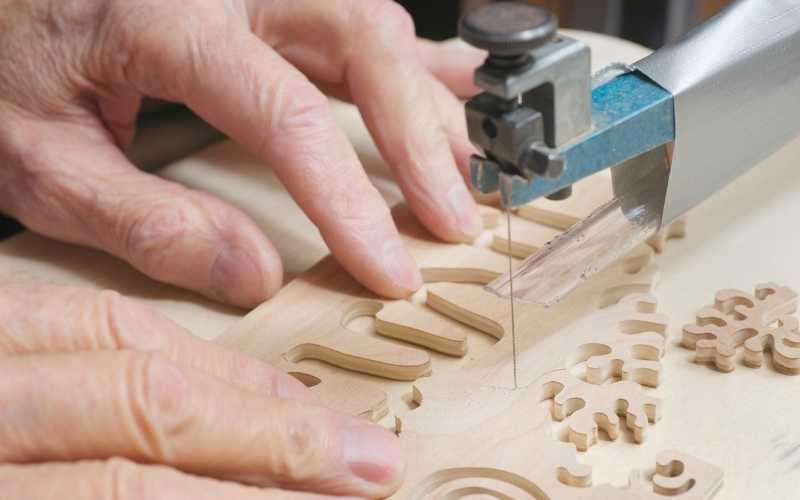
A scrollsaw is a powerful tool for cutting intricate shapes. Its vertical blade is able to be swiveled so that it can make curved cuts. Scroll saws are available in many sizes, and can be carried around easily. A patented feature reduces vibrations which allows you to work without a heavy table. Many scroll saws feature blade attachments and secure locking mechanisms.
FAQ
Where can I find free woodworking plan?
For free woodworking blueprints, you don’t need to read any magazines or buy any books. You just need to search Google. Enter "free woodworking", and you will see hundreds upon hundreds of websites offering free plans.
How much will it cost to get started?
Because every project is unique, there aren't exact numbers. These are the factors that will give you an idea of how much you'll need.
-
Material costs
-
Tools and equipment
-
Time spent on the project
-
The hourly rate
-
What amount of profit can you expect to make?
-
No matter if you are looking to hire someone
Start small, if possible. You can make simple boxes or picture frames if you're just getting started. As you gain experience, you'll be able to tackle more complex projects.
What kind and type of wood should i use?
Oak, maple, cherry and mahogany are the most common wood types used for woodworking. Every type of wood is different and can have a unique look and feel that will affect the final product. Oak tends to be harder and darker than other woods. Birch is soft and light, and mahogany is denseer and heavier. You can also pick between veneers and solid wood. Veneers are thin sheets or wood that are glued together into one layer.
Statistics
- If your lumber isn't as dry as you would like when you purchase it (over 22% in Glen Huey's opinion…probably over 10-15% in my opinion), then it's a good idea to let it acclimate to your workshop for a couple of weeks. (woodandshop.com)
- Most woodworkers agree that lumber moisture needs to be under 10% for building furniture. (woodandshop.com)
- Average lumber prices rose about 600 percent between April 2020 and May 2021. (familyhandyman.com)
- The best-paid 10 percent make $76,000, while the lowest-paid 10 percent make $34,000. (zippia.com)
External Links
How To
How to make wood joint
This tutorial will show you how to join two pieces of wood together. We will be using the "pocket-hole joint", which involves drilling holes in wood and then gluing them together. This method works great if your wood is straight and smooth. Dowel joinery might be a better option if your wood is not straight or flat. These are the steps
-
Drill Pocket Hole Joints. You will need to measure and mark the exact location of your pocket hole joint. You will then drill 3/4" deep holes through each piece of wood with a jigsaw, handheld drilling machine, or hand-held drill.
-
Sand Smooth. Sanding the wood's edges will help ensure that the joint won't split later.
-
Glue Together Apply glue to both ends of the wood. Allow the wood to rest for five minutes before clamping it together.
-
Clamp the Pieces Together. After the glue has dried properly, clamp the pieces together to make sure they are flush.
-
Trim Joinery. After the glue dries completely, trim off any excess wood around the joint.
To be able to turn the pieces inside-out, leave enough room between them.