
Proper tension is essential when setting up a bandsaw. There are many things to consider when setting up a band saw. Your final cut will be affected by how it is set up. These steps will help you set up your band saw and get you cutting! Listed below are some tips that will help you maximize your band saw's potential. They are not easy to follow, but they will be worth it in time.
To set up a bandsaw, use a tension meter
A tension meter will allow you to adjust the tension of the bandsaw with the greatest accuracy and consistency. Read the manufacturer's instructions before you begin to cut wood. These instructions will vary depending on your saw model. You should first turn the tensionwheel down about a quarter to a half turn. After this is done, you can set the blade guides at their recommended FSR.
Deflecting the blade is another way to test your bandsaw's blade tension. Then, listen for a distinct tone. A tension meter is an expensive and accurate tool that will allow you to adjust the blade tension for maximum blade life. A tension meter will cost around $400 but is well worth it. If you are hesitant about purchasing a tension gauge, you can always use the gauge to check the blade tension.
A gauge is used to test the tension of the blades
It is important to use a gauge when setting up your band saw. All blades require the exact same tension in order to cut correctly. The pulling force, usually between 200 and 800-pounds, will influence the amount of tension. A bandsaw's tension scale will give you an inaccurate reading if you don't use one. So what are you supposed to do?

A bandsaw gauge is made up of two stainless-steel plates that pivot between them and are connected by tension springs. One plate contains a numeric indicator, and the other a scale. The gauge is attached to the blade by three pins. Two pins rest on either side, while the third pushes against the blade the other.
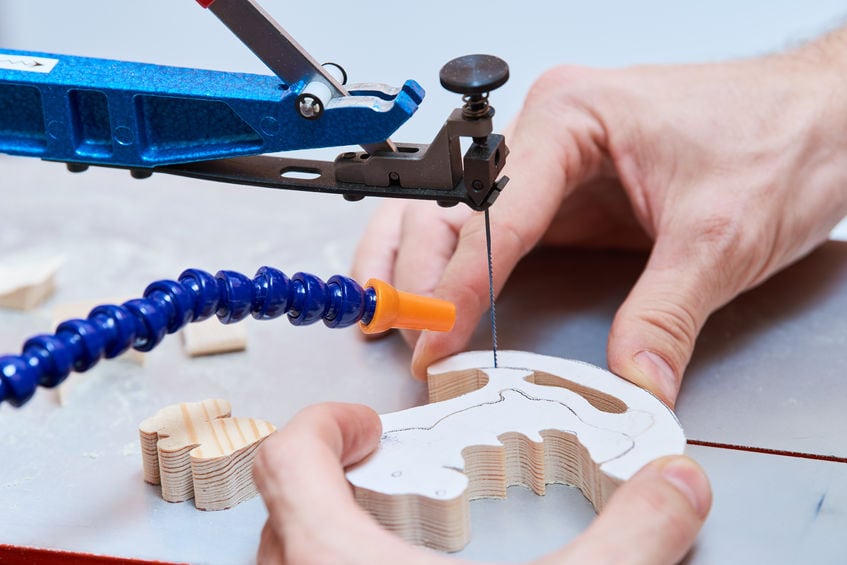
Tracking a blade
Quality cuts can only be achieved by proper blade setup. To ensure a successful cut you must have the proper blade height and track. Adjust the blade height so that there is approximately one-eighth - quarter-inch clearance between the material and the blade. Too low or too high a blade height can result in excessive vibration, friction, and a deviation of the line. A tracking knob is a good option to help stabilize wobbling edges.
First, track the blade. The blade should rest on the crown of a wheel, with its deepest part in the middle. Next, tension the blade. The tracking control is usually located at back of the saw. You should apply tension to the blade. After the blade has been placed correctly, lock the control. Once you have it right, you're ready to start cutting.
You can reduce drift by using a long blade
Set up a bandsaw by placing the long blade near the center. Also, it should not be too close the wheel's rear or front edges. Generally, a blade running an eighth or quarter-inch off center is not a problem, but if your blade barely touches the wheel, it may require some adjustments. Adjust the fence and tilt your upper wheel to fix this.
It is important to have the same toe-out angle for the band saw blade as you are cutting to reduce drift. This will reduce drift, which refers to the material lost when the wood cutter cuts the first slice. You'll see how to correctly set the fence angle in the video. A jig can also be used to duplicate the fence angle.
Using a fence to align the blade
It is easy to use a fence for aligning the blade of a bandsaw. Place the fence next to the fence so that the blade is parallel to it. Next, slide the fence across the miter slot until it is flush with its face. You may also be able to use a finger to feel along the miter slot to ensure the blade is aligned properly.
Before you can adjust the fence, it is important to place the blade guides. Properly set up the bandsaw. The fence should be properly set up with a sharp knife. Adjust the fence to correct any blade movement. To measure the drift angle, you can use a jig or a bevel square. A video will show you how to do this. You must first determine what fence is causing the drift.
FAQ
How long does it take to finish a piece of furniture?
It all depends on what type of wood you use, how complex your design is, and how much finishing you use. For example, hardwoods require more maintenance than softwoods. Hardwoods also tend to be more expensive than softwoods. They last longer and are more resistant to moisture. The typical time taken to finish a piece furniture takes anywhere from one to three month.
How can I learn basic woodworking skills
Building a bench is a great way to get started in furniture building. This project can be done with any kind of wood that you have at home. If you're not sure which kind of wood to choose, you can purchase cheap pine boards at Lowes and Home Depot. After building your bench, sand off any rough edges and apply a stain or varnish.
How much money do you need to get going?
Because every project is unique, there aren't exact numbers. These are the factors that will give you an idea of how much you'll need.
-
Material costs
-
Tools and equipment
-
Time spent working on the project
-
Hourly rate
-
What amount of profit can you expect to make?
-
Hire help
If you're just starting out, you may decide to start small by making simple items such as boxes and picture frames. You'll become more proficient as you get experience.
Are you looking for tips to start a woodworking company?
Starting a woodworking business is a lot of work. You won't mind working hard if your hobby is something you love. You'll likely enjoy the challenge of owning your business.
When you are launching a new venture, it is important to be aware of the possibility that you will encounter unexpected difficulties. You might run out unexpectedly of funds. You might find customers not willing to pay the amount you expected. You need to be ready for these situations if you want to survive.
It is a good idea to create a separate bank account just for your company. You'll be able to track how much money comes in and out.
What is the difference between plywood and particle board?
Plywood consists of layers made from wood and pressed together by pressure. Plywood is available in a variety of thicknesses. It is often used to make cabinets or flooring. Particle board consists of sawdust mixed and resin. The resin is then compressed into large blocks. This board is commonly used in home improvement projects. Both types of boards are durable and easy to cut.
How long does it take to finish a piece of furniture?
It depends on what size piece of furniture you have. Smaller projects like boxes and picture frames can be finished within one day. Larger projects, such as desks and dining tables, can take several days. It takes time to stain and seal the wood properly.
Statistics
- The U.S. Bureau of Labor Statistics (BLS) estimates that the number of jobs for woodworkers will decline by 4% between 2019 and 2029. (indeed.com)
- Overall employment of woodworkers is projected to grow 8 percent from 2020 to 2030, about as fast as the average for all occupations. (bls.gov)
- In 2014, there were just over 237,000 jobs for all woodworkers, with other wood product manufacturing employing 23 percent; wood kitchen cabinets and countertop manufacturing employing 21 percent. (theartcareerproject.com)
- Woodworkers on the lower end of that spectrum, the bottom 10% to be exact, make roughly $24,000 a year, while the top 10% makes $108,000. (zippia.com)
External Links
How To
How to make wood joints
This tutorial will show how to join 2 pieces of wood together. The "pocket hole joint" is a method whereby we drill holes into the wood and glue them together. If your wood has a straight grain, smooth surface, you can use this method. You may want to consider other methods, such as dowel joining. These are the steps
-
Drill Pocket Hole Joints. To start, measure and mark where you want to put the pocket hole joint. You will then drill 3/4" deep holes through each piece of wood with a jigsaw, handheld drilling machine, or hand-held drill.
-
Sand Smooth. Sanding the wood's edges will help ensure that the joint won't split later.
-
Glue Together Apply glue to both sides of the wood. Allow it to cool for at least 5 minutes before you attach the pieces.
-
Clamp the Pieces Together. After the glue has dried properly, clamp the pieces together to make sure they are flush.
-
Trim Joinery. Trim any excess wood surrounding the joint once the glue has dried completely.
To be able to turn the pieces inside-out, leave enough room between them.