Sharp edges enhance the enjoyment of wood carving. These are some common methods for sharpening wood carving tools. Sharp edges are more durable and will last for a longer time than dull ones. Sharp edges allow for more efficient use of your tools. Sharp edges allow for easier carving and increase the cutting power. The following are three common ways of sharpening wood carving tool. Continue reading to find out more. - Using a Sharpening Stone.
Sharp edges make carving more enjoyable
In addition to sharp tools, the best carving experience is achieved by using tools with razor-sharp edges. Sharp tools are easier to use and allow for more control when carving. The smooth surface of a well-cut blade makes for a smooth cut. For a successful carving job, sharp tools are vital. Regularly sharpen your carving instruments to get the best results. Regular sharpening will keep the tools sharp and makes carving easier.
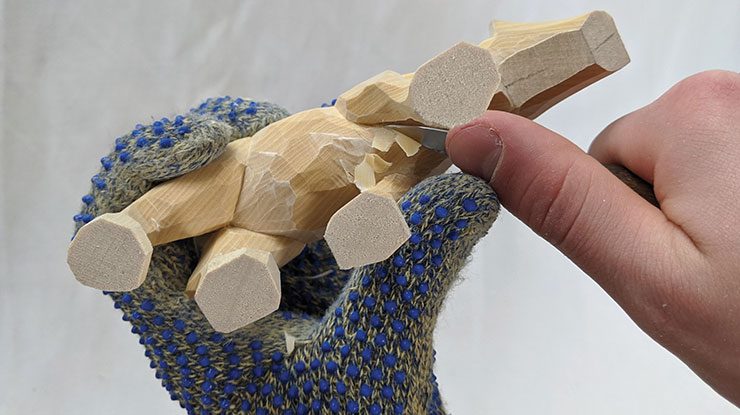
Sharp edges may enhance the enjoyment of carving, but can cause blisters. Wood's natural texture will be rough. Regular handling will help to make your hands more durable. Blisters will eventually heal into calluses, but this process is time-consuming and often painful. Try changing how you hold your tools if you notice blisters while carving. You may need to practice, but it will pay off in the end.
When sharpening your knives, begin by using a sharpening kit and a fine-grained stone. You should also check for any damage on the edge. Chips along the edge will need to be ground more vigorously. A dull edge may require minimal grinding on a finer grade grit. Test the knife by cutting through paper or rope. You don't need to use a sharpening knife if your knife has been dull for a while.
Common methods for sharpening wood carving instruments
There are many different methods of sharpening wood carving tools. There are several ways to sharpen wood carvings tools. Oil stones need oil to be applied to the stone's surface in order to prevent metal particles embedding into the surface. Both ceramic and diamond stones don’t require oil, making them ideal for sharpening wood carving tools made of carbide. This article will explain the most popular methods for sharpening wood carving tool.
Leather strops can be used to remove the wire edge from a blade and polish it. A leather strop can be used for any tool, but some carvers prefer a texture one. A flat leather strap is ideal for straight tools and the outside edge of gouges. A leather strop with grooves is for those who are serious about their work.
Traditional bench chisels were sharpened at a 25 degree angle and a secondary bevel of five degrees. Modern alloys can't be used with these angles and may break. Therefore, it is necessary to increase the angle at which the bevel is placed. This will require more force, but you'll have less control. Similar to block planes, they are typically sharpened at a 20 degree angle.
Using a sharpening stone
A sharpening knife is a tool that can be used for wood carving. The stone contains grit, a mineral in crystalline form that is harder than steel and has sharp edges. In most cases, the stone will need a lubricant to facilitate the cutting action and prevent metal particles from getting embedded in it. Once you have sharpened your edge to make it easier to cut wood, it will also be less resistant. The strop is usually made from leather and serves to remove burr and polish the edge.
There are many types of sharpening stone on the market. There are oilstones that can be used for sharpening, waterstones and ceramic stones. Oil stones use oil for lubrication to prevent metal particles from being buried beneath the stone surface. No lubricants are required for ceramic or diamond stones. They are both useful in sharpening carbide wooden carving tools.
Sentima is a fine example of a quality sharpening tool. It features a coarse and fine stone, both made of corundum. This material features a consistent grain that allows for fast cutting and smooth finishes. Its unique design also makes it easy to clean. The sharpening mechanism is made of durable materials, and it will last many years without deteriorating in quality.
FAQ
How much should a Woodworker Charge per Hour?
The hourly rate paid to a professional woodworker is dependent on many factors. These include skill level, availability, and location.
A skilled woodworker can expect an hourly rate of $20-50.
A less skilled woodworker might charge as low as $10 per hour.
Where to buy Hardwood Lumber
Home Depot offers hardwood lumber. They sell all kinds of wood products, including flooring, cabinets, furniture, etc.
They also have an extensive selection of engineered hardwoods such as Ipe (Araucaria Angustifolia), Brazilian Cherry (Pau d'Arco), and Mahogany (Swietenia Macrophylla).
You can search Google for hardwood lumber to find them online.
What is the difference of plywood and particleboard?
Plywood is made up of layers of wood pressed together under pressure. Plywood can come in many thicknesses and is used for flooring and cabinets. Particle board is made from sawdust mixed with resin and then compressed into large blocks. It's used for home improvement projects. Both boards are strong and can be easily cut.
What wood items do well?
Most wooden items that are best-sellers are made from wood harvested sustainably.
The most used wood types for furniture are oak, maple and walnut.
These woods are extremely strong but also have beautiful colors and grain patterns. They are also very durable if properly maintained.
To protect wooden furniture from moisture damage, you should paint it first. All surfaces should be painted, including doors, drawers, and handles.
Paint that is water-resistant will ensure furniture lasts for a long time.
You should use a high-quality oil-based primer followed by two coats of top coat. Depending on how often it will be worn, you may need to apply several coats.
Avoid spray cans and aerosol paints. These products can evaporate quickly and emit harmful fumes.
Statistics
- The U.S. Bureau of Labor Statistics (BLS) estimates that the number of jobs for woodworkers will decline by 4% between 2019 and 2029. (indeed.com)
- Overall employment of woodworkers is projected to grow 8 percent from 2020 to 2030, about as fast as the average for all occupations. (bls.gov)
- The best-paid 10 percent make $76,000, while the lowest-paid 10 percent make $34,000. (zippia.com)
- In 2014, there were just over 237,000 jobs for all woodworkers, with other wood product manufacturing employing 23 percent; wood kitchen cabinets and countertop manufacturing employing 21 percent. (theartcareerproject.com)
External Links
How To
Tips for driving a nail in wood
When driving a nail into wood, it is important to first choose the correct size and kind of hammer. The most popular types of hammers include claw hammers as well as mallets and ball peenhammers. Each type of hammer has its pros and cons. A clawhammer works best when hitting something hard like nails. However, it can sometimes be difficult to see exactly where the strike is going. A sledgehammer allows you to hit large areas simultaneously, but it is too heavy and cumbersome to use for small tasks.
After you've chosen the right tool, hold your hand flat to the handle so it rests comfortably in one of your palms. Grip the handle firmly, but don't squeeze it so tightly that you hurt yourself. Hold the hammer straight up, keeping your wrist relaxed. Next, swing the hammer toward the ground and aim for the nail's center. You should feel the impact on the nail from the hammer. Try practicing with a block to help you master the art of swinging a stick.
You can now drive the nail by holding the hammer to your body. To ensure that the nail is perpendicular on the surface of the wooden floor, position it. Keep your eyes focused directly on the tip of the nail. Move the hammer forward and then continue to move the hammerhead. Continue this motion several times, slowly increasing the speed of each swing. When you are confident with the technique, add power to your swings. Hold the hammer high above your shoulders and pull it down. This way, you'll be able to put more energy behind your blows.
Once you've made the first nail hole, take out the hammer. To remove the remainder of the nails, you can use a screwdriver/pry bar. To prevent splitting the wood, ensure you keep the nail heads flush against the board's surface.